LT-300HD Best Practices

Tips to Using Your Lutech Colposcope
Whether you are introducing the Lutech system into your practice for the first time or simply looking for a refresher, this overview offers practical tips to help you get the most from your digital LT-300HD Colposcope.
The LT-300HD is designed to make digital colposcopy intuitive and easy to integrate into daily practice. Remembering these key techniques can dramatically improve image quality, workflow efficiency, provider confidence, and the overall patient experience.
Distance Matters
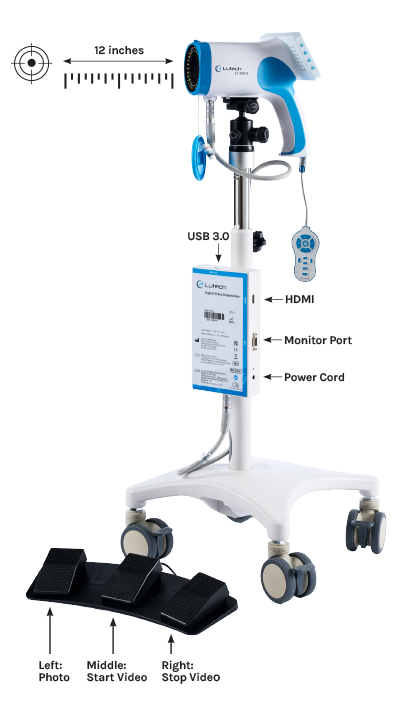 One of the most common causes of blurry images is incorrect working distance. The LT-300HD performs best when positioned approximately 12 inches from the target area. If the image becomes blurry while zooming in, the colposcope may be either too close or too far from the patient.
Maintaining proper distance helps the autofocus system function correctly and improves image stability during exams.
Plug In Before Launching the Software
Before opening the Lutech Viewer software, all cables should already be connected. This allows the system to properly recognize the device and establish the live video feed without interruption.
The camera connects directly to the computer through a USB to USB 3.0 connection, allowing high-definition video and image capture directly through the software. Optionally, you can connect to a monitor and improve patient engagement during the examination.
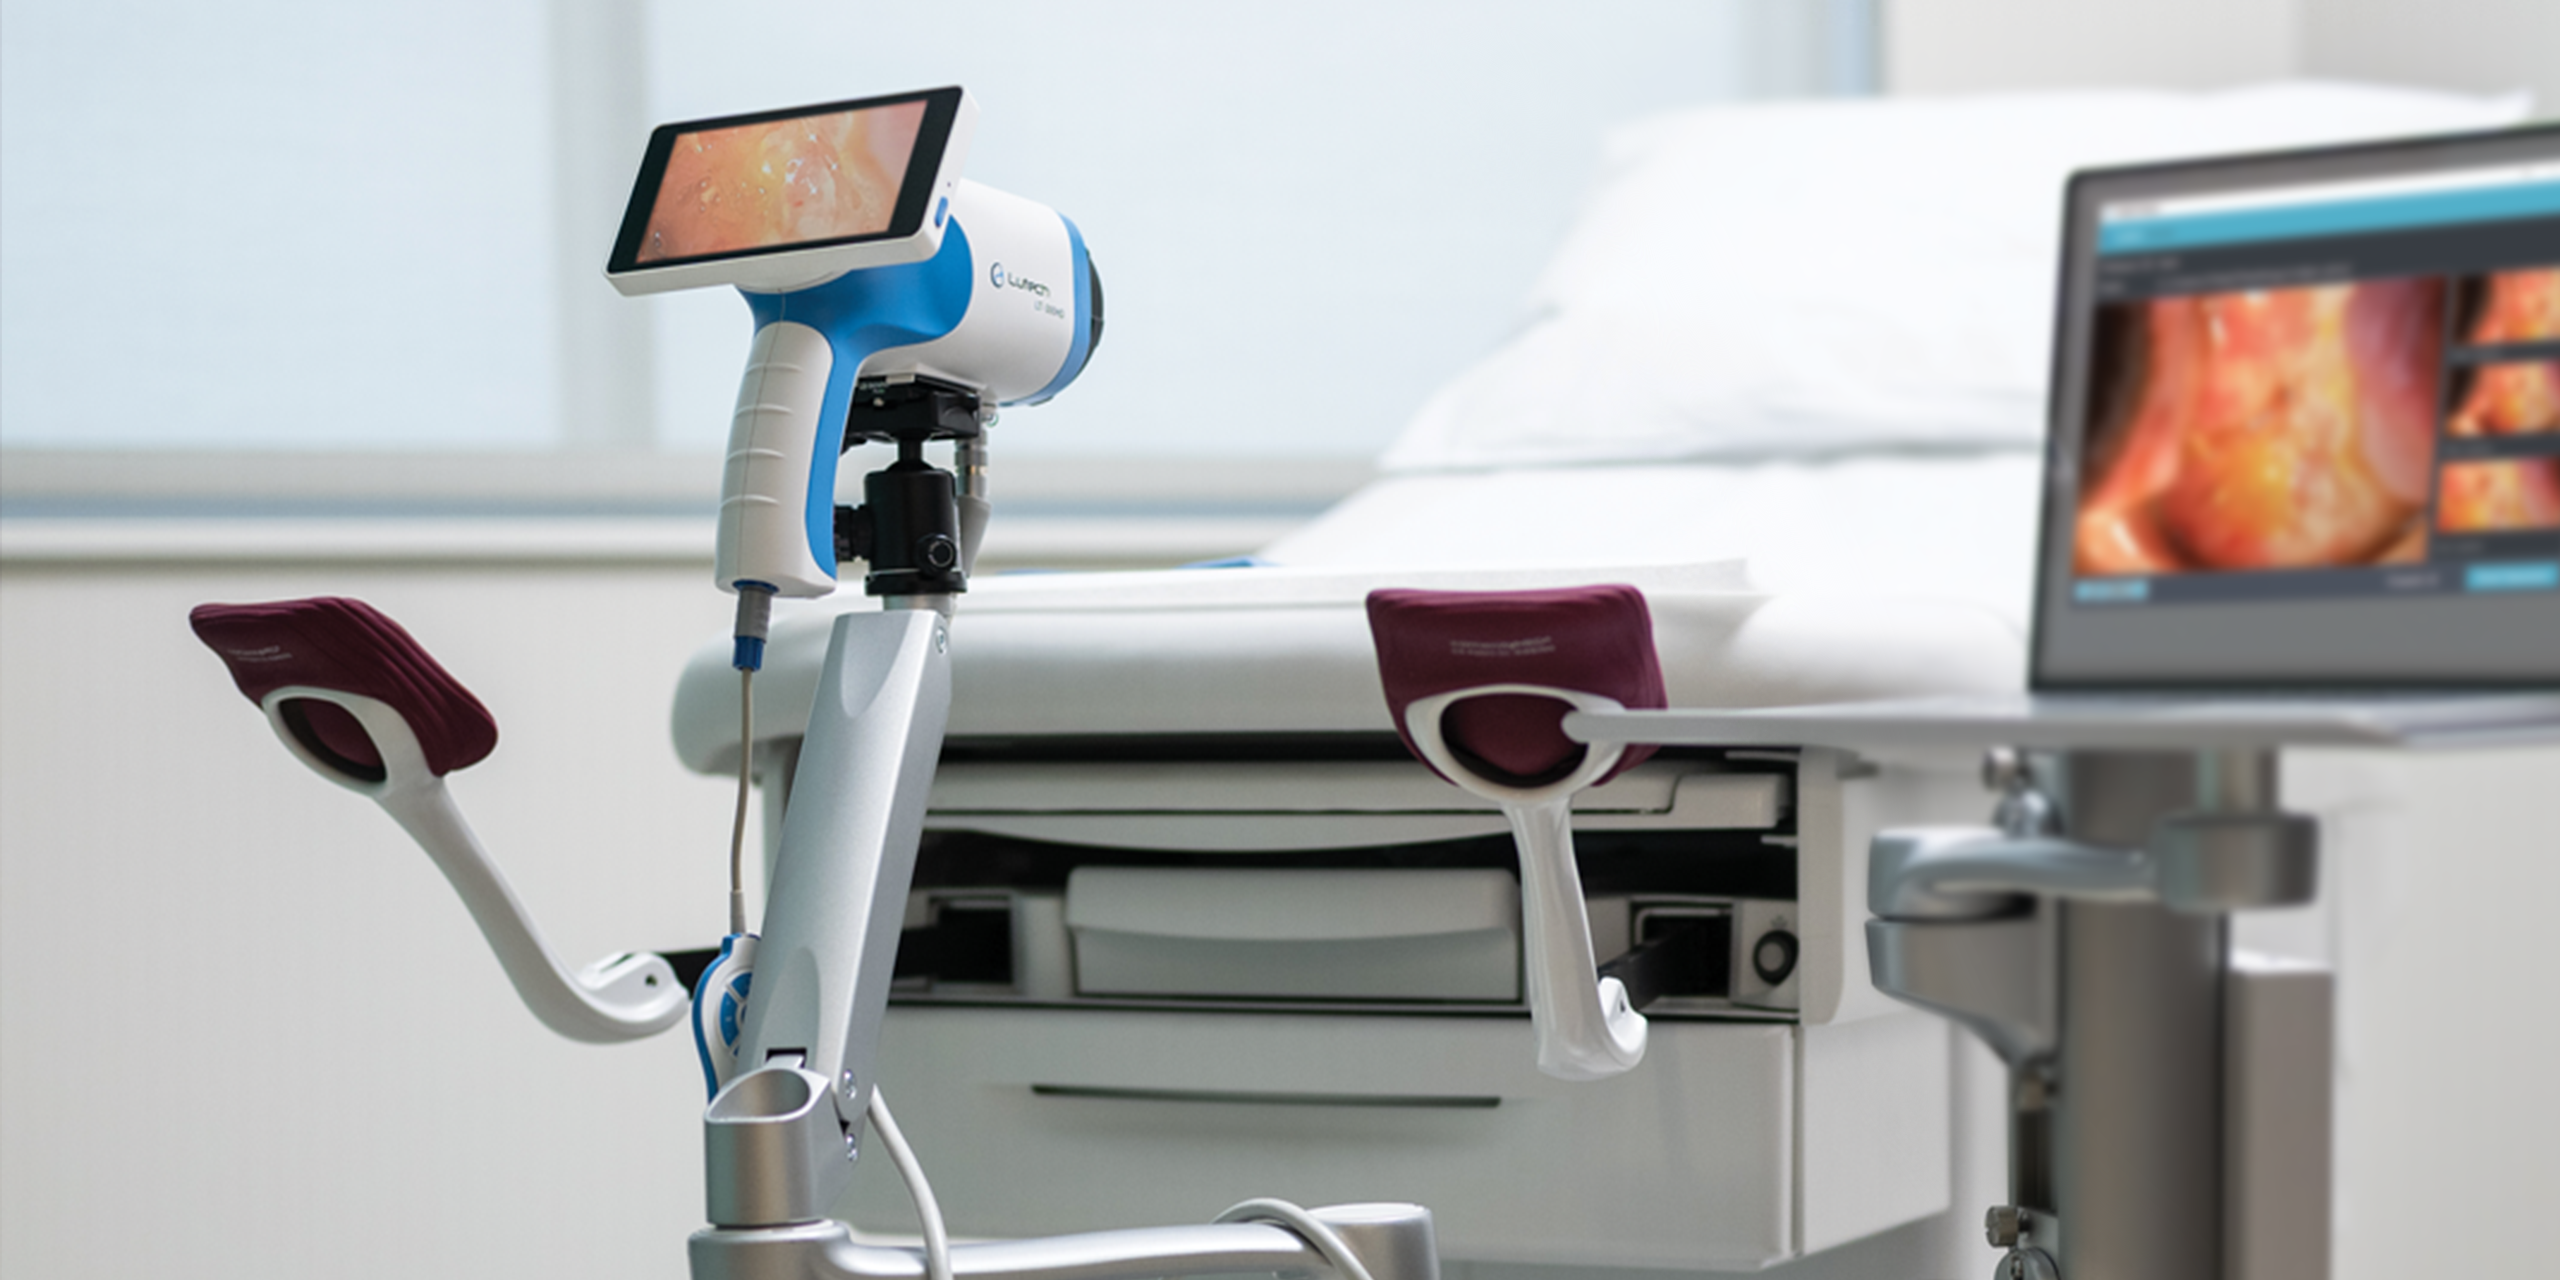
Stability Improves Visualization
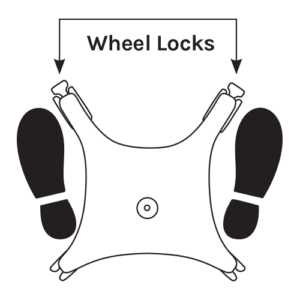
Once the colposcope is positioned correctly, locking the wheel brakes is an important step that is often overlooked. Stability becomes especially important at higher magnifications, where even small movements can impact image clarity.
Lutech training materials recommend securing the wheel locks and positioning feet on either side of the wheelbase during the exam for optimal stability.
Zoom First, Then Fine Tune with Manual Focus
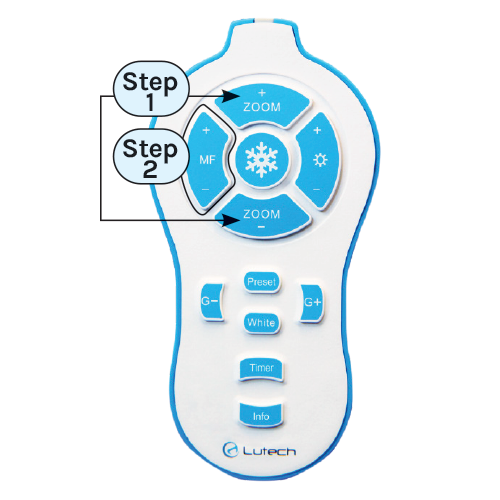 One of the key differences between the LT-300HD and traditional optical systems is how clinicians interact with magnification and focus. Use the connected remote or hands-free foot pedal for adjustments and image capture to reduce movement of the camera during the evaluation.
Follow these best practices for optimal image clarity:
1. Use the zoom controls first to locate your targeted area
2. Allow autofocus to adjust the image area
3. Use manual focus (MF+ and MF-) controls only to fine tune clarity
This process produces faster, sharper imaging and reduces exam times.
Use the remote to:
- Increase or decrease zoom magnification
- Fine tune image clarity with MF+ and MF-
- Adjust brightness and green levels
- Display current magnification information
- Capture images
Use the foot pedal to:
- Left: Capture a photo
- Middle: Start the video
- Right: Stop the video
Image Capture for improved Workflow
The LT-300HD was designed to support modern documentation practices. Clinicians can capture high-definition images and video directly through the Lutech Viewer software during the exam.
These images can then be:
- Saved to a secure network location
- Attached to procedure notes as a media file inside the EMR
- Used for progression tracking
- Referenced during follow-up visits
- Used during collaboration with colleagues
- Support SANE and forensic documentation
Lutech’s workflow supports stronger clinical documentation while improving patient education and collaboration between providers.
Need more tips?
The LT-300HD was created to simplify colposcopy while improving visualization, workflow, and documentation. Small adjustments in positioning, focustechnique, and workflow setup can make a significant difference in image quality and provider confidence.
Contact Lutech today, we provide on-going support and training to create a better experience for both providers and patients.